


Many freelancers feel uneasy when tax season arrives because the process seems built for people who already understand financial jargon. A freelancer once told me that the income-tax portal felt like a maze designed to expose mistakes, and that feeling is far more common than people admit.
This confusion often comes from unclear terminology, scattered information, and the pressure of filing independently.
The reassuring truth is that filing your return becomes much easier once the steps are explained in plain language. According to a recent government update, a large number of errors come from misunderstandings, not negligence, which means clarity makes a real difference.
With the right guidance, you can file confidently and avoid unnecessary stress while staying fully compliant.
Why Filing ITR as a Freelancer Feels Confusing
Freelancers often feel unsure about filing their ITR because their income rarely follows a single predictable flow, and the system still assumes a traditional employment pattern. A designer once told me that the tax portal felt like guessing a password you were never given, which perfectly captures how unclear the process feels at first glance.
A major part of this confusion comes from language that feels too technical for everyday use. Many beginners struggle not because the numbers are difficult, but because the terms feel unfamiliar. According to recent government observations, most first-time filing errors come from misunderstanding simple sections, not mathematical mistakes. With clarity, the entire task becomes far easier to manage.
Understanding What Counts as Freelance Income
Freelance income can be surprisingly varied, and this variety often creates uncertainty about what truly needs to be declared. Many freelancers earn through different platforms, payment apps, and occasional one-off projects, which makes it hard to understand what counts as taxable income. Once this distinction becomes clear, the filing process instantly feels less intimidating and far more structured.
Income You Must Report
These earnings are always considered part of your freelance income and should be included when filing your return:
- Payments from clients through bank transfer, UPI, or online platforms.
- Income from brand collaborations, digital content, or affiliate work.
- Fees earned from consulting, coaching, workshops, or training sessions.
- Earnings from international clients converted into rupees.
Understanding that all professional payments count as taxable receipts helps build a correct foundation for your return.
Income You Should Not Report
Some inflows appear like income but should not be declared as business receipts:
- Personal transfers from family or friends.
- Gifts received from relatives within allowed limits.
- Client reimbursements for travel or project materials.
- Fund transfers between your own bank accounts.
Keeping these out of your taxable totals prevents unnecessary confusion or accidental over-reporting during filing.
Knowing the difference between taxable and non-taxable inflows gives you greater confidence in the accuracy of your return and reduces the possibility of receiving an avoidable notice. It also helps you organise your financial records throughout the year in a way that supports clean and simple compliance.
Picking Between Old and New Tax Regime
Freelancers often feel unsure about choosing a tax regime because both options appear similar at first. The new regime gives lower tax rates but removes deductions, while the old regime keeps deductions but uses higher rates, making the decision feel tricky without simple guidance. A freelancer once said she picked one “just to get it over with,” which many quietly relate to.
What is the Old Regime?
The old regime allows various deductions and exemptions, which can reduce your total tax if you spend money on tools, workspace, insurance, training, or investments. A consultant once told me he realised the old regime saved him more once he added his real expenses, which is common for full-time freelancers. If your work life involves regular costs, this regime can be more rewarding.
What is the New Regime?
The new regime offers lower tax rates and a straight path with fewer decisions. You cannot claim most deductions, but you get cleaner rules and faster filing. This works for freelancers who keep their expenses low or do not invest much. Many choose it because the structure feels simple and easy to handle.
Simple Example Comparison
Imagine a freelancer earning ten lakh rupees but with very few expenses. The new regime usually works better because there are no deductions to claim. Now imagine someone who spends two lakh rupees on travel, software, or equipment. The old regime often saves more because those costs reduce taxable income.
These examples show that your daily work habits guide your choice.
Choosing the right regime gives you a clearer direction while filing your ITR, and once you match the regime with your spending style, the entire process becomes easier, calmer, and more accurate.
Here’s how the portal looks before you begin the filing process.
Step-by-Step Guide to Filing ITR for Freelancers
Filing your ITR becomes much easier once you understand the flow of steps. Many freelancers try to figure things out directly on the portal, which creates confusion because the system does not explain why each step matters.
Following a clear order helps you stay calm and avoid mistakes that beginners often make, especially when handling multiple income sources.
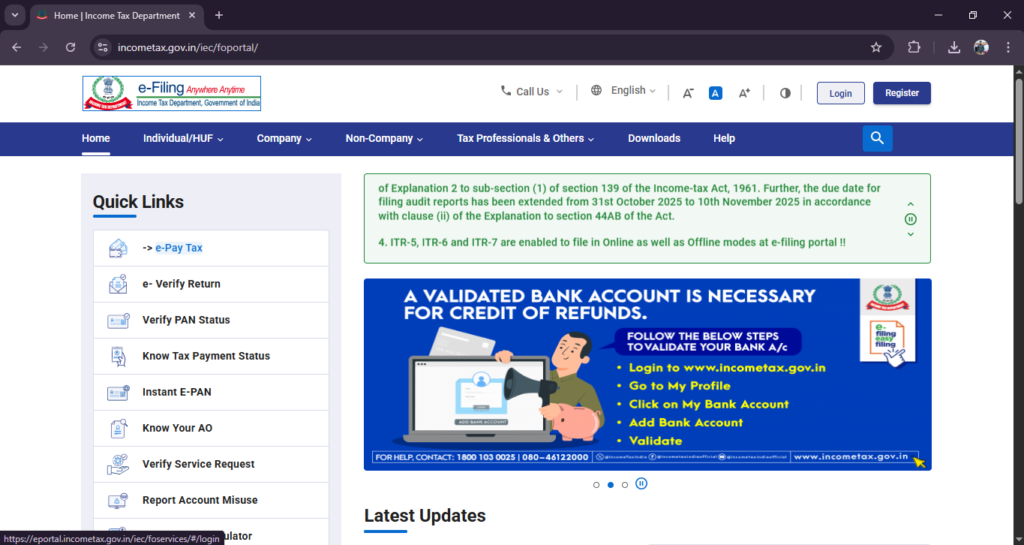
Here’s how the portal looks before you log in and begin the filing process.
Step 1 – Log In and Check Your Details
Start by signing in to the income tax portal
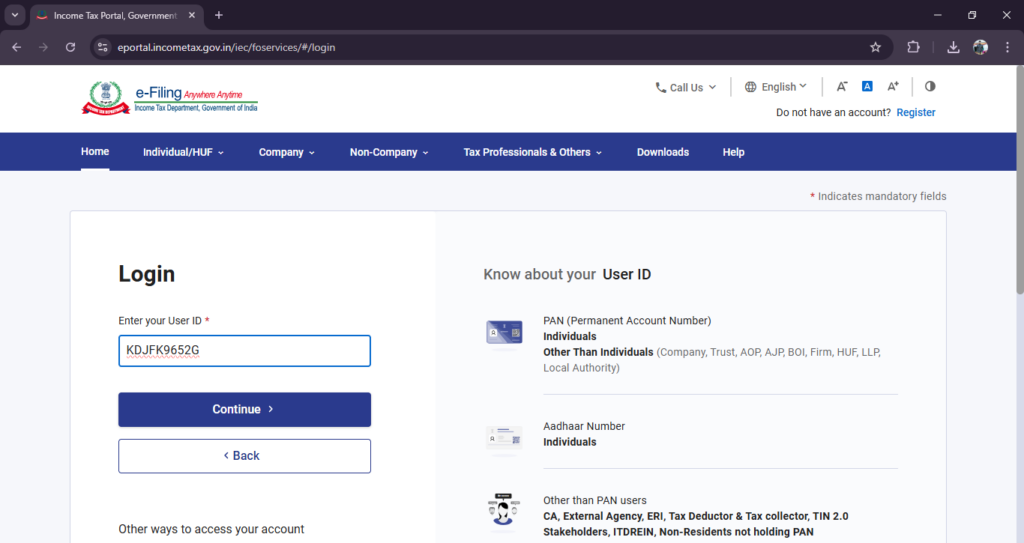
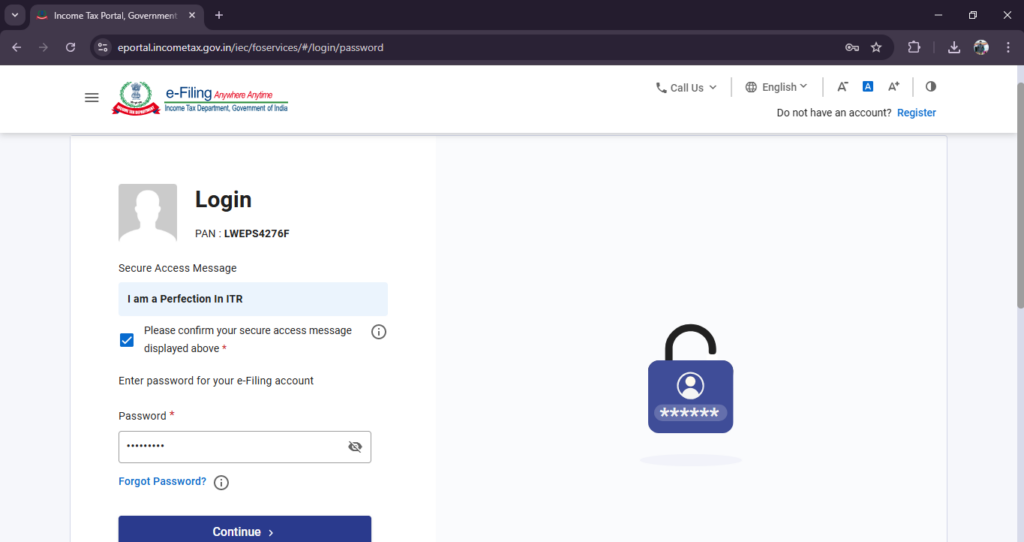
Now check if your personal information is correct. Your mobile number, bank details, and email should be updated before you move ahead. This small check prevents verification issues later and builds a clean base for the rest of your filing.
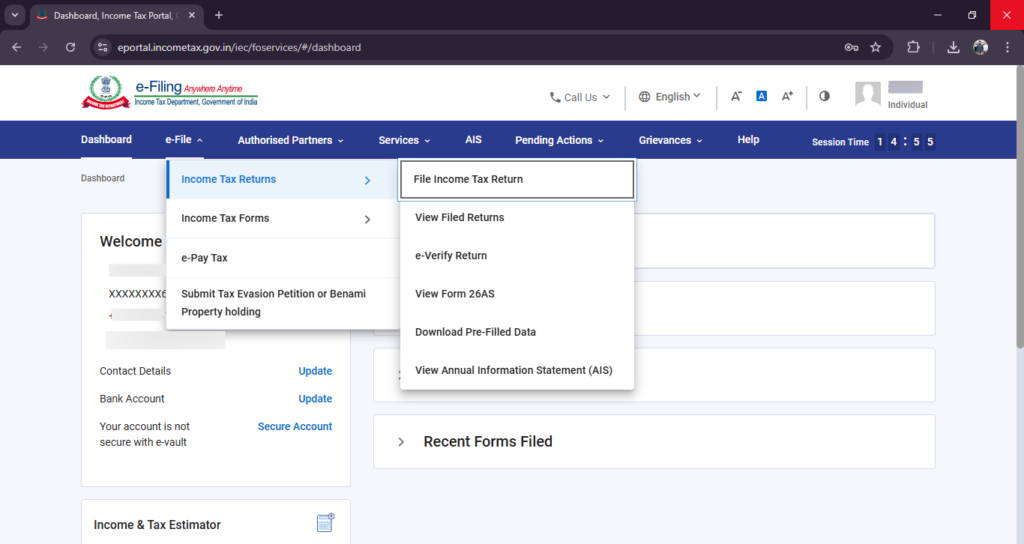
A few minutes here can save days of follow-up.
Step 2 – Select the Right ITR Form
Select the 'assessment year' first and select 'mode of filing'.
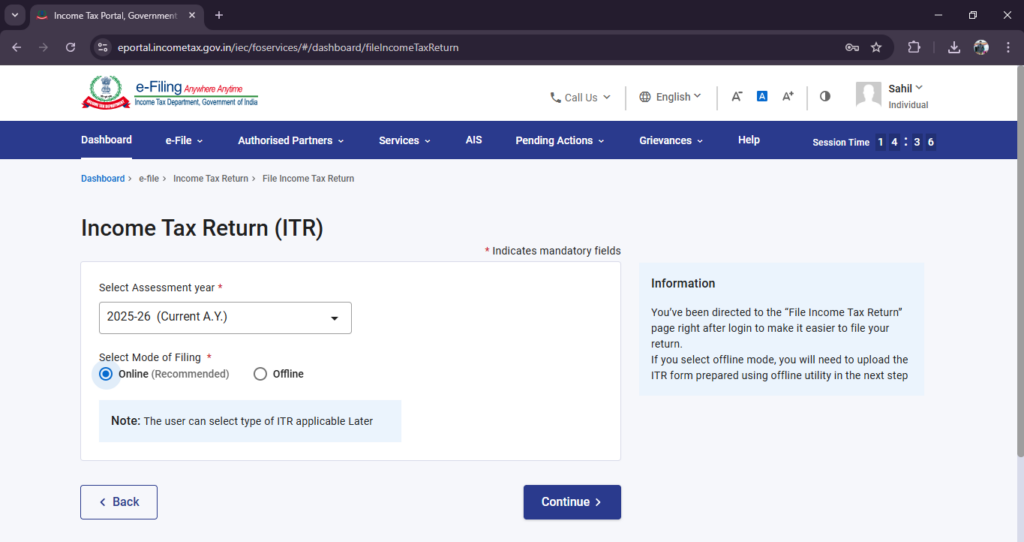
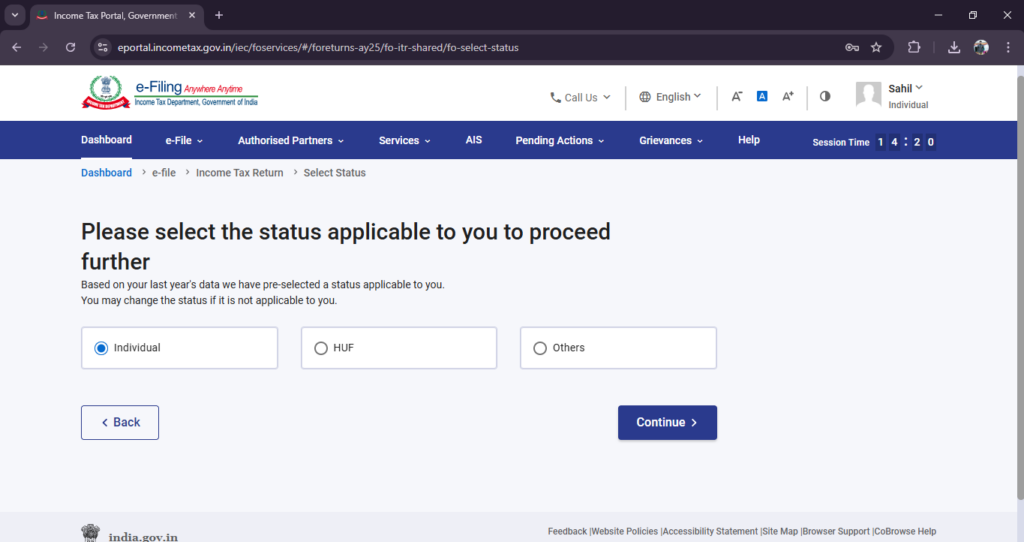
Choose ITR-3 or ITR-4 based on your income pattern and expense habits. ITR-4 works for simple freelance activity, while ITR-3 suits those who claim expenses. Selecting the wrong form leads to defective returns, which creates unnecessary stress.
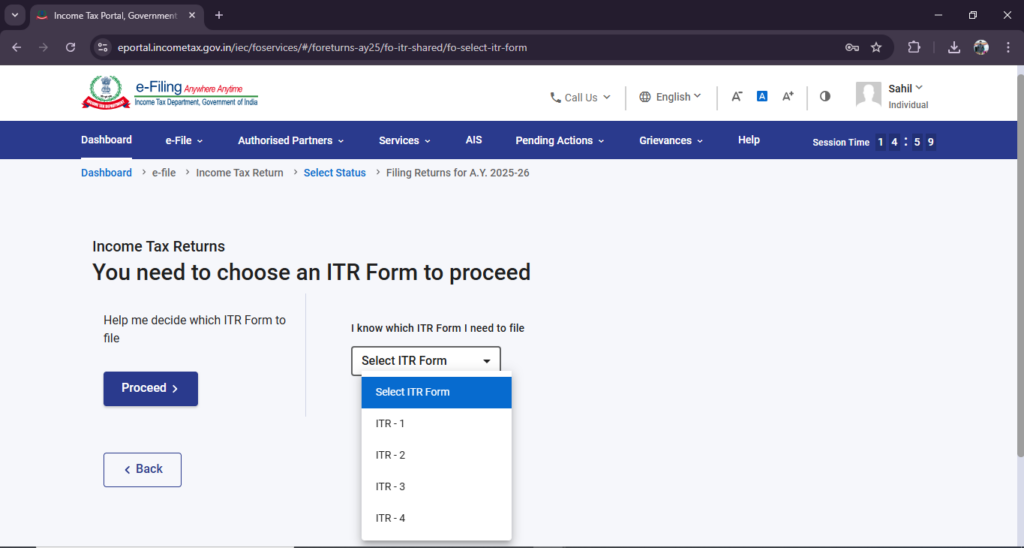
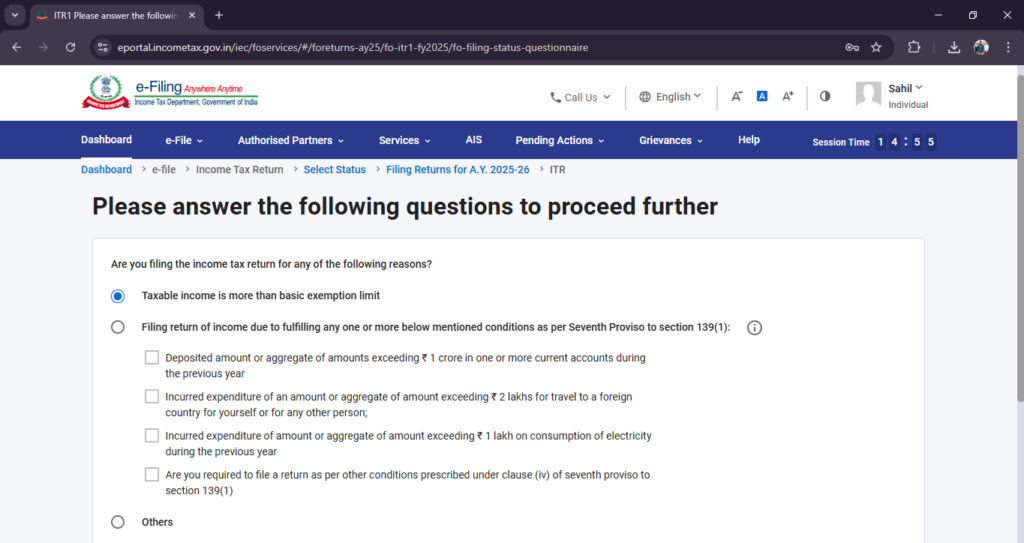
Take a moment to ensure your choice matches your work style.
Step 3 – Report Your Freelance Income
Add all payments received from clients, platforms, and international sources. If you chose the presumptive option, declare your total receipts and allow the system to apply the standard rate. If you selected actual accounting, list your receipts clearly.
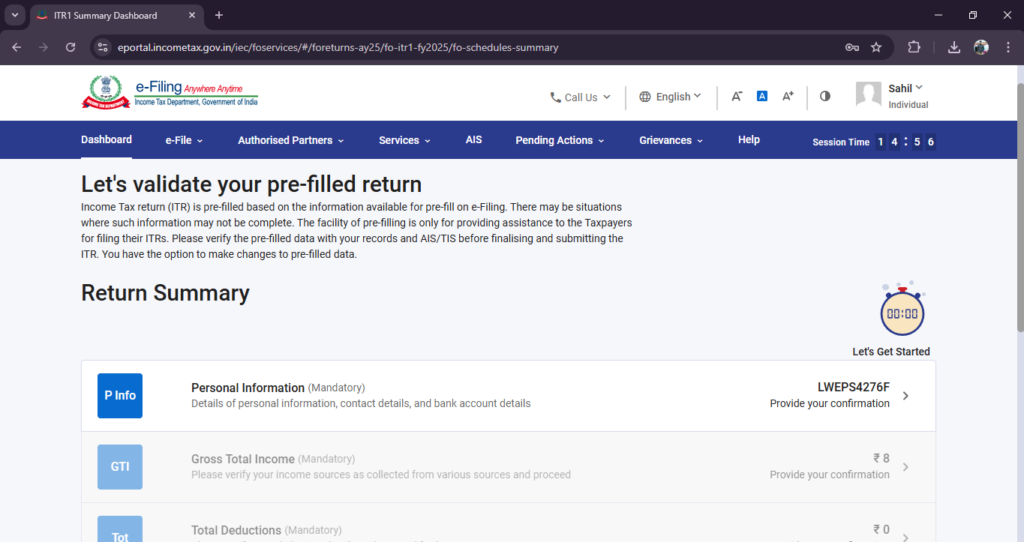
Accurate reporting builds trust and prevents mismatches with your AIS or TIS.
Step 4 – Add Deductions If You Are Eligible
Deductions apply only under the old tax regime. Add investments, health insurance, or other eligible deductions that reduce your overall tax. Many freelancers forget this step and lose savings without realising it.
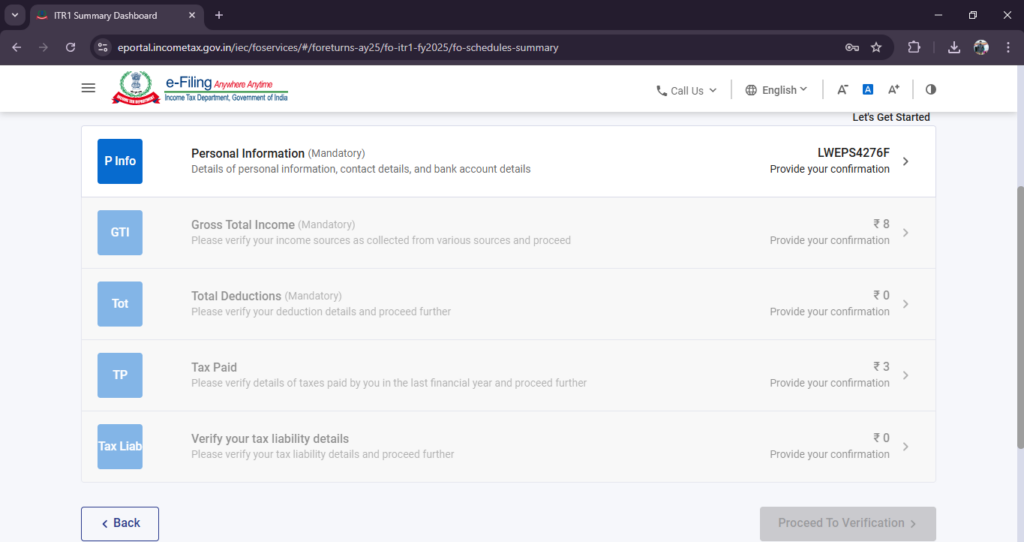
If you use the new regime, skip this part because deductions are removed by design.
Step 5 – Match Your TDS Entries
Check if your Form 26AS, AIS, and TIS match the TDS details shown on the portal. Even a small mismatch can delay your return or trigger questions later. Many freelancers discover missing entries because clients forget to update records.
Matching these numbers ensures your return is processed smoothly and without issues.
Step 6 – Choose the Right Tax Regime
This is where the earlier comparison becomes useful. Select the regime that matches your income, expenses, and filing preference. Your choice directly impacts your final tax, so revisit your numbers if needed. Making this decision calmly ensures you do not switch back and forth during the final steps.
A clear choice here keeps the rest of your return simple.
Step 7 – Validate All Your Details
Use the preview option to check if income, deductions, expenses, and TDS entries are correct. Many freelancers discover small errors at this stage, which is why this review matters. A content creator once told me this step saved her from reporting the wrong amount.
Validation gives you the confidence that everything is in place.
Step 8 – Submit and E-Verify Your Return
Click submit once you feel everything looks accurate, and complete the e-verification using Aadhaar OTP or net banking. Your return is accepted only after this step, so do not miss it. E-verification ensures your filing is marked complete and ready for processing by the system.
Once verified, your part of the job is done.
A steady, step-by-step flow like this removes the fear many freelancers feel at tax time. When every action has a simple purpose behind it, the entire process becomes smooth, predictable, and easy to complete without stress.
Allowed Expense Deductions for Freelancers Who Use ITR 3
Many freelancers miss out on deductions because they do not know what they are allowed to claim. These deductions lower your taxable income and reflect the real cost of doing your work.
When you understand which expenses qualify, you gain better control over your taxes and avoid paying more than required, especially if your projects involve regular investments.
Here are common expenses you can claim:
- Laptop, mobile, and accessories used for work.
- Internet and phone bills connected to your freelance activity.
- Workspace rent or coworking fees for your office setup.
- Travel costs for meetings or client work.
- Software tools and apps needed for projects.
- Education or online courses that support your skills.
- Office furniture or equipment used for work.
- Professional fees paid to editors, designers, or accountants.
When you track these expenses through the year, you create a clearer financial picture and reduce your tax burden naturally, which is one of the biggest advantages of using ITR-3 as a full-time freelancer.
Common Mistakes Freelancers Should Avoid
Freelancers often make small mistakes during filing because they are unsure of what truly matters in the process. These errors may seem minor, but they can cause unexpected notices, delays, or unnecessary stress later. Understanding these common slip-ups helps you file with more confidence and avoid issues that many freelancers face, especially when handling multiple income sources.
Here are mistakes to watch out for:
- Reporting income from only one account, even when you use several.
- Ignoring AIS or TIS summaries, which must match your numbers.
- Selecting the wrong ITR form, especially when claiming expenses.
- Skipping expense tracking, which reduces your tax benefits.
- Choosing a tax regime without comparison, resulting in higher tax.
When you stay aware of these common issues, you give yourself a smoother filing experience and reduce the chance of errors, helping you complete your return with clarity and peace of mind.
When Freelancers Might Need Expert Help
Freelancers usually manage their ITR on their own, but certain situations can feel confusing even with guidance. It is normal to reach a point where you want a second opinion, especially when your work becomes more complex. Knowing when to seek help is not a weakness; it simply keeps your filing accurate and protects you from avoidable problems that may appear later.
You may need expert support in these situations:
- Receiving payments from foreign clients with currency conversions.
- Facing repeated TDS mismatches across different clients.
- Managing high yearly business expenses and depreciation.
- Handling GST along with income tax, especially as a sole proprietor.
- Getting notices often, due to old returns or past errors.
When you step back and ask for help at the right time, you protect your income and keep your financial steps clean, which gives you more confidence as your freelance career grows.
Final Checklist Before You Submit
A final review makes your filing more accurate because it helps you spot small mistakes you may have missed earlier. Freelancers often skip this step because they feel tired after entering all the details, but a quick checklist helps prevent errors that might lead to delays, notices, or confusion later, especially when managing several income sources.
Here is a quick checklist to review:
- Correct ITR form selected for your work.
- Right tax regime chosen for your income pattern.
- Income matched across all accounts used for freelance work.
- AIS, TIS, and 26AS compared and confirmed.
- TDS entries checked for accuracy.
- Expenses recorded if you are using ITR-3.
- Deductions added if you follow the old regime.
- Preview reviewed for any mistakes.
- E-verification completed so your return is officially submitted.
Completing this checklist takes only a few minutes, but it gives you the confidence that your return is complete, correct, and ready for processing, allowing you to finish your filing with peace of mind.
Conclusion to Your ITR Filing Journey
Filing your ITR as a freelancer becomes much easier when you understand each step clearly. Many freelancers begin with confusion, yet they soon discover that a little structure and calm guidance removes most of the stress. When you know how income, expenses, and documents work together, filing stops feeling heavy and starts feeling manageable with each passing year.
As you continue your freelance work, stay patient with yourself and take things one step at a time. With practice, clarity turns into confidence, and confidence makes every future filing smoother. You don’t have to feel lost in the process anymore, because the right information always brings freedom and peace of mind.
If this guide helped you, feel free to explore more topics or share what you want explained next.